Kefir is quick and easy to make! Read our guide to learn more......
- You need at least one Teaspoon of milk kefir grains
- Place about 1 teaspoon of grains into a jar.
- Pour in your chosen milk (250ml)
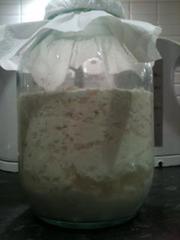
- Place the lid on, or cover with a cloth and a rubber band.
- Let your jar sit at room temperature away from direct sunlight for 24-48 hours
- Strain finished kefir into a jar through a nonmetallic, fine-mesh strainer.
- Place grains into a new jar or vessel and cover in milk.
- Repeat.
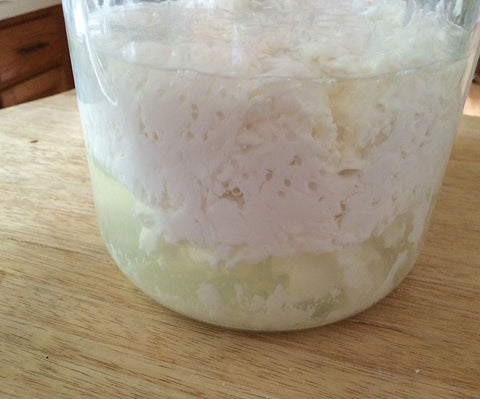
When kefir has been fermented for a while, it can begin to separate. It might not look pretty, but it is totally fine. The clear liquid is kefir whey, a magical substance that you can use to ferment other things that may not readily ferment (fruit chutneys, condiments, etc). If you want it to get back to a drinking consistency, simply stir it up using a non-metal implement and then pour through the sieve you may need to pour the kefir drink through the sieve a few times if its really thick curds.

How do i know when it ready?
basically when its thicker than milk and has started to separate. It will smell sharp/sour and possibly yeasty and cheesy.

here is a good example of ready kefir. you can see that it is separating but is not as separated as above and has little rivers of whey running through it . This will make nice and thick kefir.
STORING GRAINS
If you can’t kefir every day for the rest of your life (who can, honestly?) grains can happily and safely be stored at in fresh milk in your refrigerator for 10 days as they are live they don't come with an off switch! Even if you don’t culture your grains in whole milk (although we recommend you do), I recommend storing them that way. DO NOT STORE THEM LIKE THIS IN THE FRIDGE TOO OFTEN they are a room temperature bacteria and if they are kept at the wrong temperature for too long bacteria will start to die off.
- Temperature – Room temperature is great for milk kefir. I have found that anything in the 64 to 78 degree F (17.7-25.5 C) range will work just fine. In my experience, a broad range of “room” temperatures work well for kefir, but major changes in temperature will impact the speed at which your kefir ferments. When the seasons change, your kefir will most likely need a little adjustment time. Warmer temperatures will speed up fermentation, lower temperatures will slow it. I find that in periods of seasonal change, my kefir is sometimes thin in consistency or very yeasty smelling. I don’t let this bother me too much, as they always come out fine after a week or two of adjustment.
- Aerobic or Anaerobic? – There are different kinds of fermentation. Some require air, others require no air. Milk kefir is technically an anaerobic process, but you don’t need to work to keep your grains submerged like you do when pickling vegetables. The milk itself seems to be a sufficient barrier to air, and many of your grains will stay at the bottom of your vessel during fermentation.
- Fermentation Time – There is definitely some subjectivity here, although you do want to care for your grains by giving them a somewhat balanced living environment. The longer they ferment the more acidic your kefir will be and the lower it will be in lactose. I don’t recommend fermenting for longer than 48 hours. Although these grains are acid tolerant, even they have their limits. If you like a lower lactose product, I recommend continuing fermentation (secondary fermentation) after removing the grains. If you want to experiment with longer fermentation times, you can always wait until your grains grow enough to split and then use your spare set for experimentation. My preferred time is 24 hours during stable periods. When the weather gets very cold, they usually need at least 36 hours. When the weather gets very hot, they are occasionally done in 12 hours.
MILK CHOICE
You can make milk kefir from just about any kind of milk, but please read below exceptions and details. Just remember to give your grains a period of adjustment when you switch from one milk to another. UHT milk is not suitable.
- Fat content – Grains are happiest in full-fat milk. The texture and consistency are more to my liking and the grains seem to ferment and reproduce more readily in full-fat milk than in lower-fat milks. However, lower-fat milks are totally fine to use if that’s what you and your family prefer. Your grains may reproduce more slowly, and your final product may not be as delicious and be warned that skimmed milk kefir will not get thick and lower fat milks tend to be "bitty". The fat content will also determine the thickness of the kefir
- Raw vs. Pasteurized – When you get new grains, I recommend growing them in the same type of milk that they have been grown in by their previous owner, at least for a while. If they’re used to pasteurized and you want to use raw, give them a couple weeks in their original milk, then split the grains. Run them through the normal kefir paces for a couple weeks and see how they’re doing, and continue to maintain a batch in the pasteurized milk, just in case. After several batches, take note: Have your grains shrunk or grown (weighing them before you start is a good way to measure this? Is the kefir you’re getting ideal in flavor taste and texture? If they seem to be thriving after several batches, you are good to go. Please note: there are very good reasons to pasteurize milk and we would not recommend using raw milk if you are in any of the vulnerable groups. I love Raw milk but it comes with risks so consider them before use. Pasteurized milk kefir is still full of good bacteria vitamins and minerals.
- Animal – Goat milk kefir is delicious. I’ve never had sheep’s milk kefir, or buffalo or camel but word around town is that it, too works well. Cow’s milk works great.
- Non-Dairy – Non-dairy milks do not contain lactose and are therefore inadvisable. You can do the tricky, dual-culture method, in which you switch your grains back to dairy milk every 3 brews, for more on non-dairy kefir read here

