Making homemade raw sauerkraut can be much quicker and easier than it may seem. Though you could allow it to sit and ferment for weeks, raw sauerkraut is generally ready within 4- 7 days (when using one of the vegetable starter cultures it will fully ferment with a high probiotic content in 7 days, so it speeds but in this recipe i am just using salt) The longer it ferments, or cultures, the more probiotic support it offers your digestive system. Though there are numerous ways to complicate this recipe, I'm keeping it to the bare minimum of ingredients to show how easy it really is.
NEED FERMENTING EQUIPMENT? BUY CROCKS AND STARTERS
Cultured foods aid in digestion as well as provide friendly-bacterial support for your intestines. This is especially great in winter when we tend to eat less produce, and is especially beneficial for vegetarians, vegans and raw foodists
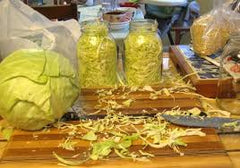
Firstly, you need to gather the very few things you'll need to pull off superb sauerkraut. Here I use both green and purple cabbage, which results in a pinkish purple striped sauerkraut. The process is the same no matter how much or which cabbage you use. You can use as much as you have room for in your best ceramic or glass bowl (or fermenter or jar). I used about half a head of each cabbage (or one whole head of cabbage) and it yielded 1 quart of finished sauerkraut.
You Need:
1 head Green or Purple Cabbage or 1/2 head of each
Sea Salt - about 2 tablespoons
A Knife and Cutting Board
2 Glass or Ceramic Bowls that fit inside one another (sterilized in boiling water or a dishwasher)
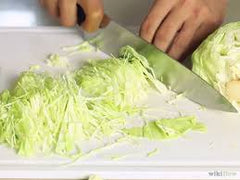
Remove the outer leaves of the cabbage and reserve them to use later. You want to slice the cabbage as thinly as possible. Many people prefer to use a food processor, mandoline or other slicing devices to achieve very thin, even slices. I've found that a good sharp knife does a fine job.
As you chop the cabbage, start placing layers in your ceramic or glass bowl and sprinkle with the sea salt. The salt pulls the water from the cabbage which creates the brine that the sauerkraut will use to culture itself in. If you are using both colors of cabbage you'll want to alternate green and purple layers. Sprinkle each layer generously with the salt.
In order to get the culturing process started you'll need to press the cabbage down into the bowl as much as possible. Spend a couple minutes just pressing it down with your fingers. This draws the water out. Then arrange the whole leaves of cabbage over the top and make sure it is totally covered. If you need to, you can use some plastic wrap to cover it entirely.
You need to put some weight on top of the cabbage in order to draw the water out and allow the fermenting process to happen. Use the second ceramic or glass bowl to sit on top of the cabbage leaves and add a weight to it such as a heavy vegetable or even a rock.
Alternatively, you can weigh it down with a zip lock bag full of salt water. Making the water in the bag salty prevents the project from spoiling if the bag should leak.
Over the first 24 hours, check the kraut 3 to 4 times and press it down to make sure that the water level rises to just above the cabbage. Otherwise the experiment will go bad. If after 24 hours there isn't enough water to completely cover the cabbage, mix 1 teaspoon of sea salt with 1 cup of water and use only enough of this brine to fill in the water line to just above the level of the cabbage.
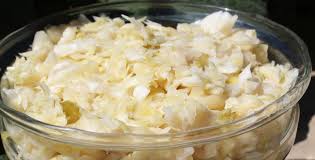
Depending on the temperature of your kitchen, humidity of your climate and many other mysterious factors, the sauerkraut will take anywhere from 3 days to a week or more to ferment and reach that tangy flavor. Check it once daily to see how it is coming along. You can allow it to continue fermenting even after it achieves that classic flavor, but the first few times you experiment, you may want to quit while you're ahead to avoid ruining the batch and discouraging yourself.
Don't be thrown off by the aroma either! That funky, sulphuric smell means that fermentation is happening, you're moving in the right direction! You'll also see a greyish mold will form over the very top. This is normal, and quite harmless, but try to remove most of it before eating.
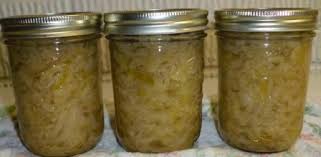
After removing the top moldy layer you'll want to put the finished sauerkraut in the refrigerator. You can either cover the bowl that it is in, or transfer it to another tightly sealed glass container/jam jar. It will keep for months in the refrigerator. Enjoy as a side dish, on sandwiches, in salads, or on its own as a snack.
In future sauerkraut endeavors, you can use a little of your homemade sauerkraut, stirred in with the fresh cabbage in Step 3 after sprinkling with the salt.
This will act as a starter for the fermentation process and get things moving along more quickly. Or you can add kefir grains or milk kefir Whey (The clear liquid at the bottom when your kefir seperates)
Below a video from Cutting edge cultures showing you how to make sauerkraut with their starter cultures. Their method is slightly different as they are using the cultures but sometimes its easier when you see it being done.